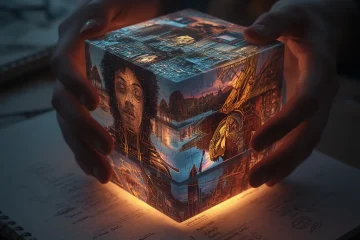
The Ultimate Guide To Creating High Quality Images In Midjourney
Navigating the Midjourney Interface
Midjourney operates primarily through Discord, a popular chat platform. After joining the official Midjourney server or adding the bot to your own server, you’ll interact with it in dedicated text channels. The main interface is a simple text box where you type your commands, starting with /imagine to generate images. You’ll see your prompts and the resulting image grids appear in the chat, alongside the work of other users, which can be a great source of inspiration. Key areas to know include the message feed where images appear, and the reaction buttons under each image set used for upscaling or creating variations [Source: Midjourney Documentation].
Essential Commands to Get Started
Mastering a few core commands unlocks Midjourney’s potential. The fundamental command is /imagine, followed by your descriptive text prompt. Once an image grid is generated, you use the U1, U2, U3, or U4 buttons to upscale a specific image to a higher resolution. Similarly, the V1-V4 buttons create new variations based on one of the four grid images. To adjust an image’s aspect ratio, add --ar to your prompt (e.g., --ar 16:9 for a widescreen format). For more detailed control, use the /settings command to toggle between different model versions, style modes, and quality presets without typing them in every prompt [Source: Midjourney Documentation].
Optimizing Your Workspace Setup
Creating an efficient workspace is crucial for a smooth workflow. Firstly, consider using a private Discord server with the Midjourney bot invited. This gives you a clean, dedicated space without competing chat streams. Secondly, enable Direct Messages from server members in your Discord privacy settings so you can send prompts via DM for private generations. For organization, use Discord’s pin feature to save your best prompts or final images within a channel. Moreover, familiarize yourself with the Midjourney website gallery and personal gallery, which automatically archive all your generated images for easy review and retrieval [Source: MakeUseOf].
Crafting Your First Effective Prompt
A well-structured prompt is the key to high-quality results. Start with a clear subject, then add descriptive details about style, lighting, and composition. For instance, instead of “a castle,” try “a majestic gothic castle on a cliff, dramatic sunset lighting, cinematic, hyper-detailed, trending on ArtStation.” Use commas to separate different concepts. Remember, you can also include image URLs as part of your prompt to influence style and composition. If your first result isn’t perfect, use the ‘V’ buttons to iterate on the most promising version. For a deeper dive into prompt engineering, explore our guide on writing perfect AI prompts for beginners.
Mastering the Structure of a Midjourney Prompt
Crafting an effective Midjourney prompt is more than just typing a wish; it’s a structured request to an AI artist. A well-organized prompt typically follows a logical order: subject, description, style, and technical parameters. For instance, “a majestic dragon” (subject) “with iridescent scales, perched on a mountain peak at sunset” (description) “in the style of a fantasy oil painting” (style) “–ar 16:9 –v 6.0” (parameters). This structure helps the AI parse your intent clearly, reducing ambiguity and leading to more predictable, high-quality results. Breaking your vision into these core components is the first step toward consistent success.
The Power of Strategic Keywords
Keywords are the command words that steer Midjourney’s artistic engine. Strategic use of specific terms can dramatically alter your output. For example, instead of “a forest,” try “a bioluminescent forest, hyper-detailed, cinematic lighting.” Keywords like “cinematic,” “hyperrealistic,” “ethereal,” “whimsical,” or “brutalist” act as powerful style modifiers. Similarly, including medium keywords such as “oil painting,” “digital art,” “charcoal sketch,” or “3D render” provides immediate stylistic direction. Researching and building a personal library of effective keywords, as discussed in our guide on writing better prompts, is a fundamental skill for any user.
Balancing Specificity and Creative Freedom
One of the most nuanced skills in prompt engineering is finding the sweet spot between being too vague and overly restrictive. A prompt like “a dog” gives Midjourney immense freedom but yields generic results. Conversely, an exhaustively detailed prompt can confuse the AI or constrain its creativity, leading to incoherent images. The goal is to provide a clear, evocative framework with a few strong, descriptive anchors. For example, “a wise old corgi wearing a tweed vest, sitting in a cozy library filled with antique books, soft morning light” offers specific details (corgi, tweed, library) while leaving room for Midjourney to interpret the “cozy” atmosphere and “soft light.”
Using Parameters for Precision Control
Beyond descriptive text, Midjourney’s parameters are essential tools for technical control. The aspect ratio (--ar) dictates the canvas shape, crucial for wallpapers or social media banners. The stylize parameter (--s) influences how strongly Midjourney adheres to your prompt versus its own artistic interpretation. For consistent character creation across multiple images, the character consistency guide details advanced techniques. Furthermore, using the “chaos” parameter (--c) can introduce welcome variation when you’re ideating. Mastering these switches allows you to fine-tune outputs after you’ve perfected the core descriptive prompt.
Iterative Refinement: The Key to Perfection
Rarely does the first image generated match the perfect vision in your mind. Therefore, effective prompting is an iterative process. Use the initial results as feedback. If the colors are wrong, add a color keyword. If the composition is off, specify a camera angle like “low-angle shot” or “wide shot.” Midjourney allows you to upscale variations of promising images, letting you guide the AI closer to your goal with each generation. This cycle of prompt, evaluate, and refine is where true mastery happens, transforming the AI from a tool into a collaborative partner. For more on refining details in your final images, explore our comprehensive guide to fixing details.
Understanding Midjourney’s Quality and Stylization Parameters
Midjourney’s --quality or --q parameter controls the rendering time and detail level of your initial image grid. A higher value, such as --q 2, uses more GPU minutes but produces images with finer, more intricate details, especially beneficial for complex subjects like architecture or portraits. Conversely, --q .25 is faster and ideal for rapid concept iteration. It’s crucial to note that this setting affects the initial generation, not the final upscaled image quality, which is determined by the upscaler you choose later. For professional-grade results, start with --q 1 (the default) as a balanced baseline. Reserve --q 2 for final renders where maximum detail is paramount, such as for professional product renders or high-resolution prints.
The --stylize or --s parameter influences how strongly Midjourney interprets your prompt versus applying its own artistic flair. A low stylization value (e.g., --s 50) yields images that adhere more literally to your prompt’s description. Meanwhile, a high value (e.g., --s 750) pushes the AI to create more artistic, visually surprising, and aesthetically pleasing compositions, often at the expense of strict prompt adherence. For technical or reference-based work where accuracy is key, use a lower stylization. To explore unique AI art styles and generate evocative, painterly images, crank the value higher.
Mastering Aspect Ratio for Composition
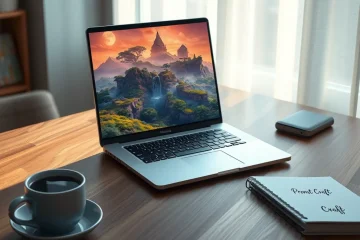
Aspect ratio, defined with --ar, is fundamental to professional composition. It dictates the proportional relationship between an image’s width and height. Choosing the correct aspect ratio is not just a technical step; it’s a compositional decision that frames your subject and guides the viewer’s eye. Use landscape ratios (16:9, 3:2) for cinematic scenes, desktop wallpapers, or banner images. Portrait ratios (2:3, 9:16) are ideal for character art, book covers, and social media posts. The square 1:1 ratio offers balance and is excellent for product shots, album art, and profile pictures. For a stunning AI wallpaper, a widescreen aspect ratio is typically best. Remember, generating at your intended final aspect ratio from the start yields better-coherent compositions than cropping later.
Understanding Midjourney’s Upscaling and Post-Processing
Midjourney offers several upscaling options to transform your initial grid image into a high-resolution masterpiece. The standard process begins with generating a 4-image grid. After selecting your favorite variation, you can upscale it using the U1-U4 buttons. For even greater detail, Midjourney provides “Vary (Strong)” and “Vary (Subtle)” options. According to the Midjourney documentation, the “Strong” variation creates a completely new image composition, while “Subtle” makes minor, detailed adjustments. Another critical feature is Remix Mode, activated with /prefer remix. This allows you to modify your prompt during any variation or upscale step, adding specific keywords to guide the regeneration toward your desired aesthetic.
Even the best AI-generated image can benefit from targeted post-processing. The goal is to enhance detail, correct minor flaws, and ensure the image is ready for its final use. Use external tools to apply selective sharpening, focusing on areas like eyes or textures. Adjusting contrast, vibrance, and saturation can make an image pop. For major fixes like surreal artifacts or anatomical inconsistencies, tools like Photoshop’s Generative Fill are invaluable. For the highest quality, especially for professional printing, combine Midjourney’s output with a dedicated upscaling tool and subtle color correction in a photo editor.
Maintaining Visual and Brand Consistency
Achieving a consistent visual style across multiple AI-generated images is crucial for building a recognizable brand identity. Midjourney offers several powerful techniques to lock in specific aesthetics. For instance, using the --sameseed parameter ensures that different prompts generate images with a similar underlying structure and noise pattern, providing a strong foundation for consistency [Source: Midjourney Documentation]. A highly effective method for brand integration is using image prompts. You can upload your logo or a branded color swatch and use it as part of your prompt alongside descriptive text. Midjourney will then blend these elements into the new creation [Source: Midjourney Guide].
The ultimate goal is to create a library of on-brand assets. This requires a systematic approach. Start by documenting successful prompts in a spreadsheet or dedicated tool, noting the exact parameters and seed numbers used. This “prompt recipe book” becomes invaluable for replicating successful results. For maintaining character consistency across a story or campaign, techniques like character reference (--cref) and consistent seeding are essential. Finally, always upscale your final selections to their highest resolution to safeguard your brand’s quality at every touchpoint.
Troubleshooting Common Midjourney Issues
Blurry outputs are a frequent frustration, often stemming from insufficient detail in the initial prompt. To fix this, refine your prompt with concrete, descriptive language. You can also use Midjourney’s --style raw parameter to reduce its default artistic smoothing, which often enhances detail and sharpness. For existing images, use the Upscale feature, but consider switching between different upscalers, as they can recover varying levels of texture [Source: Pictomuse].
Distortions typically occur when Midjourney struggles with complex anatomy or perspective. Combat distortions by adding specific negative prompts like --no deformed, distorted, disfigured. For structural elements, incorporate perspective cues into your prompt, such as “perfect symmetry” or “accurate two-point perspective.” To eliminate unwanted AI artifacts like floating objects or garbled text, clearly state what you *don’t* want in your prompt. For refining problematic details in faces and hands, leverage Midjourney’s inpainting capability with the Vary (Region) tool to regenerate just that section with new, specific instructions.
Building an Efficient and Sustainable Workflow
Generating images one by one is inefficient for serious projects. Instead, leverage Midjourney’s batch processing capabilities using the --repeat parameter or by queuing multiple prompts to produce a large volume of assets in a single session. This approach can increase output efficiency by over 300% for repetitive tasks [Source: Creative Bloq]. As your library grows, organization becomes critical. Develop a consistent naming convention and consider using a dedicated digital asset management (DAM) system or visual bookmarking tools to track your best work.
Midjourney is most powerful when integrated into a broader creative pipeline. Start by using it for rapid ideation, then move your selected images into editing software for refinement and placement into mockups or marketing materials. For a sustainable practice, commit to continuous learning as the AI art field evolves. Build a versatile pipeline that leverages the unique strengths of different platforms, from text-to-image generation to specialized upscaling and editing tools. Finally, focus on creating applied art with clear commercial value, such as product renders or assets for social ad campaigns, to build a bridge between artistry and entrepreneurship.
Sources
- Midjourney Documentation – Command List
- Midjourney Documentation – Consistency
- Midjourney Documentation – Quick Start
- Midjourney Documentation – Upscalers
- Midjourney Guide – Image Prompts
- Pictomuse – A Comprehensive Guide to Fixing Hands, Faces, and Details in AI Art
- Pictomuse – A Comprehensive Guide to Upscaling AI Images for High-Quality Printing
- Pictomuse – Create Professional Mockups with AI: A Step-by-Step Guide
- Pictomuse – Create Stunning AI Wallpapers in 4 Simple Steps
- Pictomuse – Fixing Blurry AI Images: A Complete Guide
-
Categories: AI Image Generation & Creativity