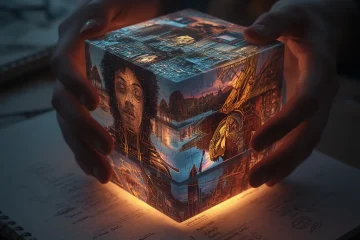
The Ultimate Guide To Creating High Quality Images In Midjourney
Understanding Midjourney’s Core Parameters
Mastering Midjourney begins with its core parameters, the essential commands that give you precise control over your final image. These settings allow you to define everything from the composition and quality to the artistic style, transforming a simple prompt into a professional-grade visual. By learning how to use parameters like aspect ratio, stylization, and quality, you can consistently produce images that match your creative vision.
Aspect Ratio: Framing Your Vision
The --ar or --aspect parameter defines the width-to-height ratio of your image. This is one of the most powerful tools for composition, as it directly influences the scene’s focus and feel. For instance, a cinematic 16:9 aspect ratio is ideal for widescreen landscapes, while a classic 1:1 square works well for social media posts or product shots. Midjourney supports common ratios like 3:2 for photography and 9:16 for vertical mobile content. Choosing the right aspect ratio at the start ensures your image is framed correctly for its intended use, whether it’s a desktop wallpaper or a banner ad.
Stylization: Controlling Artistic Freedom
The --stylize or --s parameter controls how strongly Midjourney interprets your prompt versus applying its own artistic flair. It ranges from 0 to 1000, with a default of 100. A lower value (e.g., --s 50) results in images that adhere very closely to your descriptive text, often producing more literal and predictable results. Conversely, a higher value (e.g., --s 750) gives the AI more creative license, leading to more artistic, surprising, and visually complex outputs. This parameter is key for balancing specificity with creative discovery, allowing you to fine-tune the AI’s “imagination” level for each project.
Quality vs. Speed: The Detail Trade-off
The --quality or --q parameter determines how much processing time is spent rendering your image, affecting the level of detail and coherence. Values are .25, .5, 1, and 2. The default is 1. A lower quality setting like --q .5 is faster and consumes fewer GPU minutes, which is useful for rapid prototyping of ideas. However, higher quality settings like --q 2 produce images with significantly finer details, more intricate textures, and better overall coherence, especially for complex subjects. It’s the go-to setting for final artwork intended for high-quality printing or upscaling.
Choosing the Right Model Version
Midjourney continuously releases new model versions, each with unique strengths. Selecting the right one is crucial for your specific needs. As of early 2025, the main models in use are:
- Midjourney V6: The latest flagship model, offering the highest realism, improved prompt understanding, and superior handling of complex details like text and hands. It’s the best choice for photorealistic images, intricate scenes, and professional work.
- Midjourney V5.2: A highly reliable and balanced model known for its strong aesthetic sense and beautiful, painterly outputs. It remains a popular choice for artistic and stylized creations.
- Niji Model: A specialized model tuned in collaboration with Spellbrush, optimized for anime, illustrative, and vibrant cartoon styles. It’s perfect for character art, manga scenes, and any project requiring a dynamic, animated look.
You specify the model with parameters like --v 6.0 or --niji 6. Experimenting with different models is the best way to understand their distinct “personalities” and find the perfect tool for your chosen art style.
Putting It All Together: A Parameter Blueprint
The true power of parameters lies in combining them. A professional workflow often starts with a lower quality setting for fast concept iteration, then applies the full suite of parameters for the final render. For example, a prompt for a brand logo might use --ar 1:1 --s 200 --v 6.0 to get a square, moderately stylized, highly detailed image. Meanwhile, a landscape artist might use --ar 16:9 --s 750 --q 2 to create a widescreen, highly artistic masterpiece with maximum detail. By understanding these core controls, you move from guessing to directing, unlocking Midjourney’s full potential for professional renders, stunning wallpapers, and beyond.
Mastering Prompt Engineering Fundamentals
An effective Midjourney prompt is a structured instruction that guides the AI from a general concept to a specific visual outcome. Consequently, it typically follows a logical sequence: subject, description, style, and technical parameters. For instance, a basic prompt like “a cat” will generate a generic image. However, by adding descriptive layers—”a fluffy Siamese cat perched on a sunlit windowsill, cinematic lighting, photorealistic, 8k”—you provide the AI with a clear roadmap. This structure helps the model understand not just what to create, but how to render it with specific qualities and atmosphere.
Core Components of a Strong Prompt
Every powerful prompt balances several key elements. First, the subject must be clearly defined. Next, descriptive details about the scene, lighting, and mood add depth. Following this, artistic style keywords (e.g., ‘cyberpunk,’ ‘watercolor,’ ‘Studio Ghibli style’) direct the aesthetic. Finally, technical parameters like aspect ratio (–ar 16:9) and version (–v 6.0) fine-tune the output. Mastering this anatomy is the first step toward consistent, high-quality results, as detailed in our ultimate guide for beginners.
Keywords That Consistently Produce High-Quality Results
Certain keywords act as powerful modifiers, reliably elevating image quality and style. Terms related to photography and rendering are exceptionally effective. For example, “photorealistic,” “8k,” “detailed texture,” “cinematic lighting,” and “shot on 70mm lens” instruct the AI to prioritize realism and detail. Similarly, artistic movement keywords like “Art Nouveau,” “impressionist,” or “retrofuturism” can instantly apply a coherent and sophisticated style. Moreover, adjectives that describe atmosphere and mood—such as “ethereal,” “dramatic,” “serene,” or “dynamic”—help convey the intended emotional tone of the piece.
Leveraging Artist and Genre References
Referencing specific artists, studios, or film genres is a proven technique for achieving distinct visual styles. Prompting with “in the style of Hayao Miyazaki” or “cinematography by Roger Deakins” leverages the AI’s training on their known works. Additionally, combining these with medium keywords like “oil on canvas,” “charcoal sketch,” or “3D render” further refines the output. This approach allows you to tap into established visual languages, creating art that feels intentional and professionally crafted. For a deeper exploration of styles, see our guide on the top AI art styles to explore.
Balancing Specificity with Creative Freedom
The central challenge of prompt engineering is finding the sweet spot between precise instruction and open-ended creativity. Over-specifying every detail can lead to rigid, sometimes conflicting, compositions. Conversely, a prompt that is too vague may produce generic or unpredictable results. The key is to provide a strong foundational framework—the core subject, key style, and essential mood—while leaving room for Midjourney’s own algorithmic “interpretation” to add surprising and creative flourishes.
Start with a clear vision but use open-ended descriptive terms. Instead of “a red brick house with two windows and a green door,” try “a charming cottage with rustic details, vibrant garden, warm afternoon light.” This sets the scene but allows the AI to fill in architectural specifics. Furthermore, use weighting (::) to emphasize crucial elements without banning others. For example, “fantasy landscape::2 with a crystal cave::1.5” tells the AI the landscape is the primary focus. Finally, iterate. Use an initial image as a creative springboard, then refine your prompt for the next variation, gradually honing in on your vision while embracing happy accidents. This iterative process is a cornerstone of professional AI-powered concept art creation.
Ultimately, mastering these fundamentals transforms prompt writing from a guessing game into a collaborative dialogue with the AI. By understanding the prompt’s anatomy, deploying high-impact keywords, and strategically balancing detail with freedom, you gain consistent control over your creative outcomes, unlocking Midjourney’s full potential as a tool for artistic expression (Source: Midjourney Documentation).
Advanced Techniques for Professional Results
Negative prompting is a powerful technique for refining AI-generated images by explicitly telling the model what not to include. This is essential for eliminating common artifacts like extra fingers, distorted faces, or unwanted background elements. For instance, adding “--no blurry, deformed hands, extra limbs” can dramatically improve anatomical accuracy. According to research on prompt engineering, using negative prompts helps steer the model away from low-probability but undesirable outputs, giving you greater creative control [Source: arXiv]. For a deeper dive into fixing common AI art flaws, see our guide on fixing hands, faces, and details.
Strategic Multi-Prompting and Parameter Tuning
Moving beyond a single instruction, multi-prompting involves breaking your vision into weighted segments. You can assign different importance levels to concepts using syntax like (concept:1.5) for emphasis or [concept:0.8] to reduce its influence. This allows for complex scenes, such as “(a majestic eagle:1.3) perched on (an ancient oak tree:1.0), [cloudy sky:0.7].” Furthermore, fine-tuning parameters like the CFG scale, which controls how closely the AI adheres to your prompt, is crucial. A higher CFG scale (e.g., 10-12) yields more precise results, while a lower scale (e.g., 5-7) allows for greater model interpretation and artistic randomness [Source: Hugging Face].
Leveraging Style References and Image Weights
For professional branding or series consistency, using image references is a game-changer. Many advanced AI platforms allow you to upload a reference image to guide the style, color palette, and composition of a new generation. This technique, often called “img2img” or style transfer, ensures visual coherence across a campaign. Similarly, prompt weighting can be used to maintain character consistency; by strongly weighting a character’s description across multiple prompts, you can generate the same subject in different scenarios. These methods are foundational for creating a unified visual identity, a topic explored in our guide to mastering character consistency.
Advanced Workflow: Combining Techniques
The most professional results come from strategically layering these techniques. Start with a detailed multi-part prompt, apply negative prompts to prune errors, use a style reference image for tonal consistency, and then fine-tune the generation with specific sampler and step settings. For example, creating a product render might involve a prompt weighted heavily on the product details, a negative prompt excluding “shadows, text, watermark,” and a style reference from your brand’s previous photography. This holistic approach transforms AI from a novelty into a reliable professional tool. To see how this applies to commercial work, explore our guide to professional product renders.
Optimizing for Different Use Cases
AI image generation is a versatile tool, but its output is highly dependent on the specific use case. A prompt that creates a breathtaking landscape will fail to produce a marketable product render. Therefore, optimizing your approach for different professional and creative applications is essential for achieving stunning, usable results.
Creating Stunning AI Portraits
Portraiture demands a focus on human likeness, emotion, and detail. To achieve realistic AI portraits, you must master specific prompting techniques. Start by specifying the subject’s attributes in detail: age, ethnicity, hair style and color, eye color, and facial expression. Including descriptive terms like “symmetrical face,” “detailed skin texture with pores,” and “catchlights in the eyes” adds crucial realism.
Furthermore, the choice of artistic style is paramount. For a classic look, reference styles like Rembrandt lighting or film noir photography. For contemporary portraits, terms like “editorial photography” or “cinematic portrait” work well. Always include negative prompts to avoid common AI pitfalls, such as “deformed hands,” “asymmetrical eyes,” or “blurry face.” For an in-depth exploration of this process, see our dedicated guide on the art and science of creating realistic AI portraits.
Architectural Visualization and Interior Design
For architects and designers, AI is a powerful tool for ideation and client presentation. The key here is precision and environmental context. Prompts must specify the architectural style (e.g., “Brutalist,” “Scandinavian modern”), materials (“concrete,” “oak flooring”), and the time of day or lighting conditions (“golden hour,” “soft ambient interior lighting”).
To create professional visualizations, use camera angle terms like “wide-angle lens,” “architectural photography,” or “interior design shot.” Including details about the environment, such as “lush courtyard garden” or “urban skyline view,” grounds the design in a believable space. This approach allows for rapid iteration of concepts, enabling professionals to explore more creative options before finalizing plans (Source: ArchDaily).
Professional Product Photography and Renders
In marketing and e-commerce, high-quality product visuals are non-negotiable. AI can generate photorealistic product shots and renders without the need for expensive photoshoots. Success hinges on describing the product with extreme detail: its material, color, finish, and brand. A prompt for a sneaker, for example, should include “leather and mesh upper, gum rubber sole, orange accent stitching.”
Set the scene with professional photography terms. Use “product photography on a white background,” “studio lighting with soft shadows,” or “lifestyle shot on a marble tabletop.” For advanced applications, you can even create professional mockups to showcase your product in context. For a complete workflow, our ultimate guide to creating professional product renders with AI covers everything from initial prompt to final polish.
Generating Abstract and Conceptual Art
This use case offers the greatest creative freedom, focusing on emotion, concept, and composition rather than literal representation. Effective prompts for abstract art often describe feelings, movements, and textures. Think in terms like “fluid dynamics,” “ethereal glow,” “geometric fragmentation,” or “chaotic harmony of colors.”
Referencing artistic movements is highly effective. Prompt for art in the style of “abstract expressionism,” “cubism,” or “liquid art.” You can also combine contradictory concepts to spark unique creations, such as “mechanical organic growth” or “frozen flame.” This exploratory process is less about precision and more about guiding the AI’s “imagination” toward a novel aesthetic outcome, pushing the boundaries of the future canvas where mind and machine collaborate.
By tailoring your strategy to these distinct use cases—portraiture, architecture, product work, and abstract art—you transform