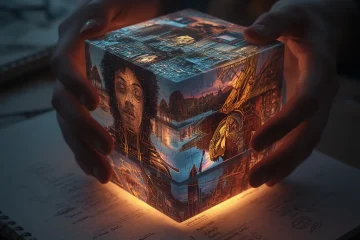
The Complete Guide To Mastering High Quality Midjourney Images
Mastering Image Quality: Aspect Ratio, Resolution, and Core Parameters
Creating high-quality AI art starts with understanding the fundamental settings that control your output. These parameters act as the digital canvas and paintbrush, determining everything from the shape and clarity of your image to its artistic flair. By mastering aspect ratio, resolution, and key parameters like --q, --s, and --stylize, you gain precise control over your creative vision.
Aspect Ratio: Framing Your Vision
The aspect ratio defines the proportional relationship between an image’s width and height. Choosing the right one is crucial, as it dictates the composition and intended use of your artwork. For instance, a square 1:1 ratio is perfect for social media profile pictures, while a wide 16:9 ratio is standard for desktop wallpapers or video content. Conversely, a tall 9:16 aspect ratio is ideal for mobile stories or Pinterest pins. Selecting an appropriate aspect ratio at the start ensures your final image fits its purpose without awkward cropping or distortion.
Resolution and Detail: The –q Parameter
While aspect ratio sets the frame, resolution and the --q (quality) parameter determine the level of detail and computational effort. In platforms like Midjourney, --q accepts values from .25 to 2, with higher numbers producing more detailed, coherent images at the cost of more GPU minutes. For example, --q 2 is excellent for final artwork with intricate textures, while --q .5 can be used for faster concept sketching. It’s important to note that --q influences detail within the initial image generation, not its pixel dimensions. For true high-resolution outputs suitable for professional printing, you will need to utilize upscaling tools after generation.
Stylization and Creativity: –s and –stylize
Beyond technical quality, AI art generation offers parameters to steer artistic style. The --stylize command (often abbreviated as --s) influences how strongly the AI interprets your prompt versus applying its own artistic flourishes. A lower stylization value (e.g., --s 50) yields results that closely follow your prompt’s literal description. Meanwhile, a higher value (e.g., --s 750) encourages the AI to be more creative, artistic, and abstract, potentially leading to more surprising and visually complex compositions. Experimenting with this parameter is key to finding the right balance between your direction and the AI’s unique artistic style.
Putting It All Together: A Workflow for Quality
An effective workflow begins by defining your goal. First, select an aspect ratio that matches your final platform. Next, use a moderate --q setting (like 1) for initial prompt testing. Once you have a promising composition, adjust the --stylize parameter to dial in the desired artistic effect. Finally, generate your chosen image with a higher --q setting for maximum detail and then upscale it. This structured approach gives you control from sketch to final masterpiece, ensuring your AI-generated images are not only creative but also technically proficient for any application.
The Art of Prompt Engineering: Keyword Hierarchy, Style, and Negation
Crafting a perfect AI image prompt is less about issuing a command and more about conducting an orchestra. Each element of your prompt plays a specific role, and understanding how to structure them—using keyword hierarchy, style descriptors, and negative prompts—is the key to achieving professional, predictable results.
Establishing a Keyword Hierarchy
Think of your prompt as having a primary subject, supported by secondary details and atmospheric modifiers. This hierarchy tells the AI what is most important. The primary subject should be stated clearly and first. For instance, “a majestic eagle” is your core. Next, add secondary details like its action and environment: “soaring over a misty mountain peak at sunrise.” Finally, layer in atmospheric modifiers for mood: “epic scale, golden hour lighting, sense of freedom.” This structured approach, often called “subject + action + environment + style,” gives the AI a clear roadmap. Placing the most critical element first ensures it remains the focal point, while subsequent details refine the scene without confusing the core instruction [Source: ZDNet]. Consequently, you move from vague ideas to precise visual blueprints.
Leveraging Style Descriptors for Cohesion
Style descriptors are your most powerful tool for defining the artistic output. They can reference specific art movements, renowned artists, cinematic techniques, or even photographic terms. For example, adding “in the style of Studio Ghibli” or “cinematic, shot on 70mm film” provides immense creative direction. Moreover, combining style descriptors with medium and quality keywords creates a cohesive aesthetic. A prompt like “portrait of a cyberpunk samurai, neon-noir style, digital painting, hyper-detailed, 8K resolution” leaves little room for ambiguity. For a deep dive into specific visual aesthetics, explore our guide on the top AI art styles to explore. This precision ensures every generated image aligns with your professional vision.
The Strategic Use of Negative Prompts
While telling the AI what you want is crucial, telling it what you *don’t* want is equally important. Negative prompts exclude unwanted elements, distortions, or low-quality artifacts. This is essential for fixing common AI art issues like mangled hands, blurry faces, or unwanted text. For example, adding `–no deformed hands, blurry, watermark, text, ugly` can dramatically improve output quality. Advanced platforms like Midjourney and Stable Diffusion allow for weighted negative prompts, where you can strongly discourage specific features. Mastering this technique is a cornerstone of professional work; learn more in our comprehensive guide to fixing AI art details. Therefore, negative prompts act as a quality control filter, refining the raw generation into a polished final piece.
Bringing It All Together: A Professional Prompt Formula
A professional prompt synthesizes all these elements into a single, effective instruction. Follow this formula as a starting point:
[Primary Subject] + [Action/Context] + [Detailed Environment] + [Art Style/Medium] + [Quality/ Lighting Descriptors] + [Negative Prompts]
Example: `A futuristic architect reviewing holographic blueprints, in a sleek minimalist office with floor-to-ceiling windows overlooking a neon cityscape, concept art, unreal engine 5 render, intricate details, dramatic volumetric lighting –no messy desk, cluttered, photorealistic, people`
By mastering keyword hierarchy, you command focus. Through precise style descriptors, you dictate aesthetics. And with strategic negative prompts, you eliminate errors. Together, they transform prompt writing from guesswork into a reliable, professional skill.
Mastering Advanced Parameters for Professional AI Art
Moving beyond basic prompts requires a deep understanding of Midjourney’s advanced parameters. These commands act as fine-tuning knobs, allowing artists to inject specific qualities like controlled chaos, distinct stylistic flair, and compositional consistency into their work. For instance, the --chaos parameter influences the variability and surprise in the initial image grid, while --stylize adjusts how strongly Midjourney applies its own artistic interpretation to your prompt [Source: Midjourney Documentation]. Mastering these tools is the key to transitioning from generating random images to executing a predictable, professional workflow.
Strategic Use of –Chaos, –Weird, and –Stylize
Each parameter serves a unique purpose in the creative pipeline. Use --chaos (with values from 0 to 100) during the brainstorming phase. A higher chaos value, like --chaos 70, yields four wildly different initial compositions, perfect for exploring unexpected ideas and breaking creative blocks. Conversely, for a more controlled and predictable outcome, a low value like --chaos 10 generates very similar grid options. The --weird parameter (values 0-3000) pushes the AI to explore unconventional, surreal, and abstract associations, often resulting in dreamlike or biologically imaginative forms [Source: Midjourney Documentation]. Meanwhile, --stylize (or --s) controls the artistic “flair.” A low stylize value (--s 50) adheres closely to your prompt’s literal description, which is ideal for technical or product-focused work. A high value (--s 750) prioritizes aesthetically pleasing, artistic compositions, which is excellent for creating evocative landscape images or concept art.
Ensuring Consistency with Seed Control
For professional projects, consistency across a series of images is non-negotiable. This is where the --seed parameter becomes essential. Every Midjourney image generation starts from a random seed number, which dictates the initial noise pattern. By using the same seed value across multiple prompts, you ensure a consistent base structure, allowing you to make controlled variations. For example, after generating a character you like, use the --seed number from that job in a new prompt with slight modifications (e.g., changing the background or pose) to maintain the character’s core appearance. This technique is fundamental for mastering character consistency in branding or narrative projects.
Building Complexity with Multi-Prompt Techniques
Single prompts can sometimes lead to confusing or blended results. Multi-prompting, using double colons ::, gives you precise control over the weight and separation of concepts. The AI treats each section divided by :: as a distinct component. You can assign weights to prioritize elements; for instance, cyberpunk cityscape at night::2 neon samurai::1.5 tells the AI the cityscape is more important than the samurai. This method is perfect for complex scenes where you need clear foreground and background elements, or to ensure specific objects retain their integrity without morphing into the environment.
By combining these techniques—using --chaos for ideation, locking in a look with --seed, refining style with --stylize, and constructing detailed scenes with multi-prompts—you establish a repeatable workflow for producing high-quality, intentional AI art suitable for any professional application, from product renders to concept art creation.
Post-Generation Refinement: Upscaling, Remixing, and Inpainting
The generation is just the beginning. Professional results are achieved through a suite of post-processing techniques that refine, correct, and enhance your initial output.
Upscaling: Enhancing Resolution and Detail
Upscaling is the essential first step for transforming a low-resolution AI generation into a high-quality final piece. This process increases the pixel dimensions of an image, making it suitable for large-format printing or high-definition displays. Modern AI upscalers, like those in top AI art tools, use sophisticated neural networks to intelligently add detail, reduce noise, and sharpen edges without creating a blurry or pixelated result. For a deep dive into achieving gallery-ready prints, our comprehensive guide to upscaling covers everything from tool selection to optimal settings.
Remix Mode: Iterative Refinement
After upscaling, Remix Mode (or a similar variation/regeneration feature) allows for targeted improvements. This powerful function lets you take an existing generated image and modify the prompt while retaining its core composition and style. For example, you can change the lighting from “golden hour” to “dramatic studio lighting” or swap a character’s outfit without altering their pose or face. This is invaluable for achieving character consistency across a series of images or fine-tuning a concept based on client feedback. Effective use relies on precise, incremental changes to your prompt, turning the AI into a collaborative partner to polish a good generation into a great one.
Inpainting and Outpainting: Surgical Editing
These techniques provide pixel-level control for fixing flaws or expanding a scene. Inpainting allows you to mask a problematic area—like a distorted hand or an unwanted object—and have the AI regenerate just that section to blend seamlessly with the surroundings. For common issues, our guide on fixing hands, faces, and details offers specific inpainting strategies. Conversely, outpainting (or canvas expansion) lets you extend an image beyond its original borders, useful for changing aspect ratios or adding narrative context. Mastering this trio of techniques transforms the AI art process from a single-step generation into a refined, professional workflow.
Establishing a Cohesive Visual Identity with AI
Creating a cohesive visual identity is fundamental for professional branding, ensuring that every piece of content resonates with your audience and reinforces your brand’s core message. AI art generation tools now provide unprecedented control over this process, allowing marketers and designers to build consistent, high-quality visual systems efficiently. By mastering three key pillars—style references, color palette control, and consistent character creation—you can produce a unified brand aesthetic across all channels.
Leveraging Style References for Brand Consistency
Style references are the cornerstone of a unified visual identity. They act as a creative blueprint, guiding AI to produce artwork that aligns with your established brand aesthetic. This involves using existing images, mood boards, or even text descriptions of a desired artistic style as a prompt. For instance, you can reference the clean lines of minimalist design or the vibrant energy of pop art to ensure all generated content feels part of the same family. This technique is crucial for maintaining a recognizable look, whether you’re creating social media graphics, website banners, or product renders. Our guide on top AI art styles to explore in 2025 offers a deep dive into contemporary aesthetics that can serve as powerful references for modern brands.
Mastering Color Palette Control
Color psychology plays a vital role in branding, influencing perception and emotion. AI tools offer sophisticated color control, allowing you to lock in specific hex codes or palette themes. This ensures that every generated image adheres to your brand’s color scheme, creating a seamless visual experience. For example, you can prompt an AI to generate a landscape using only your brand’s primary and secondary colors. This level of control prevents visual dissonance and strengthens brand recall. Consistent color application across multi-channel marketing materials is a non-negotiable element of professional branding.
Achieving Character Consistency Across Campaigns
For brands that use mascots, spokes-characters, or recurring human figures in storytelling, maintaining character consistency is paramount. AI can now generate the same character in different poses, outfits, and scenarios while preserving key features like facial structure, hair, and style. This is achieved through advanced prompting techniques, seed locking, and using previous images as references. Consistent characters build narrative continuity and foster a stronger connection with your audience. For a comprehensive methodology, refer to our complete guide on mastering character consistency in AI art.
The true power for branding emerges when these elements are combined. Start by defining a core style reference and a strict color palette. Then, apply these constraints to the creation of any branded character or scene. This integrated approach ensures that a social media ad, a blog illustration, and a product mockup all feel intrinsically linked. Furthermore, utilizing AI templates for branded images can streamline this process, providing a repeatable framework that embeds your visual identity into every creation. Ultimately, this disciplined, AI-assisted workflow enables the scalable production of professional, on-brand visuals that engage customers and build lasting equity